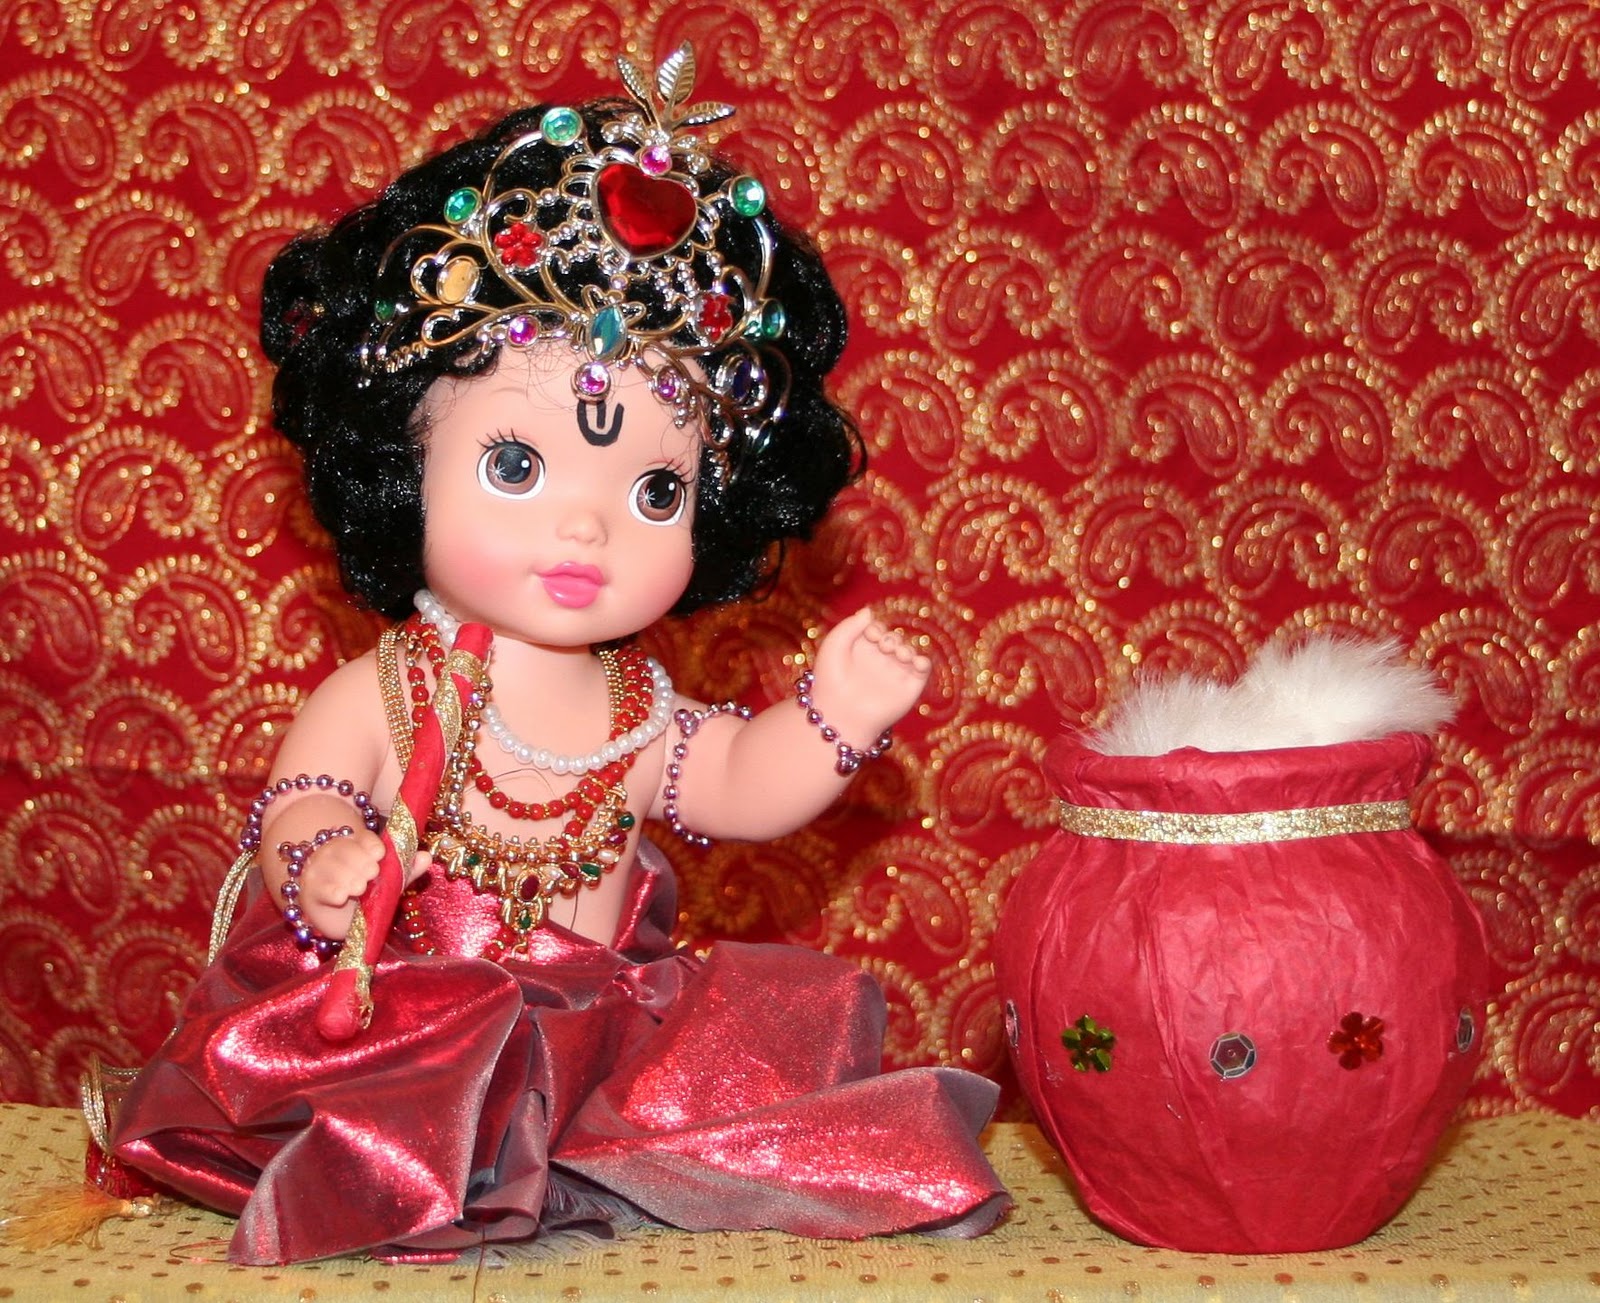
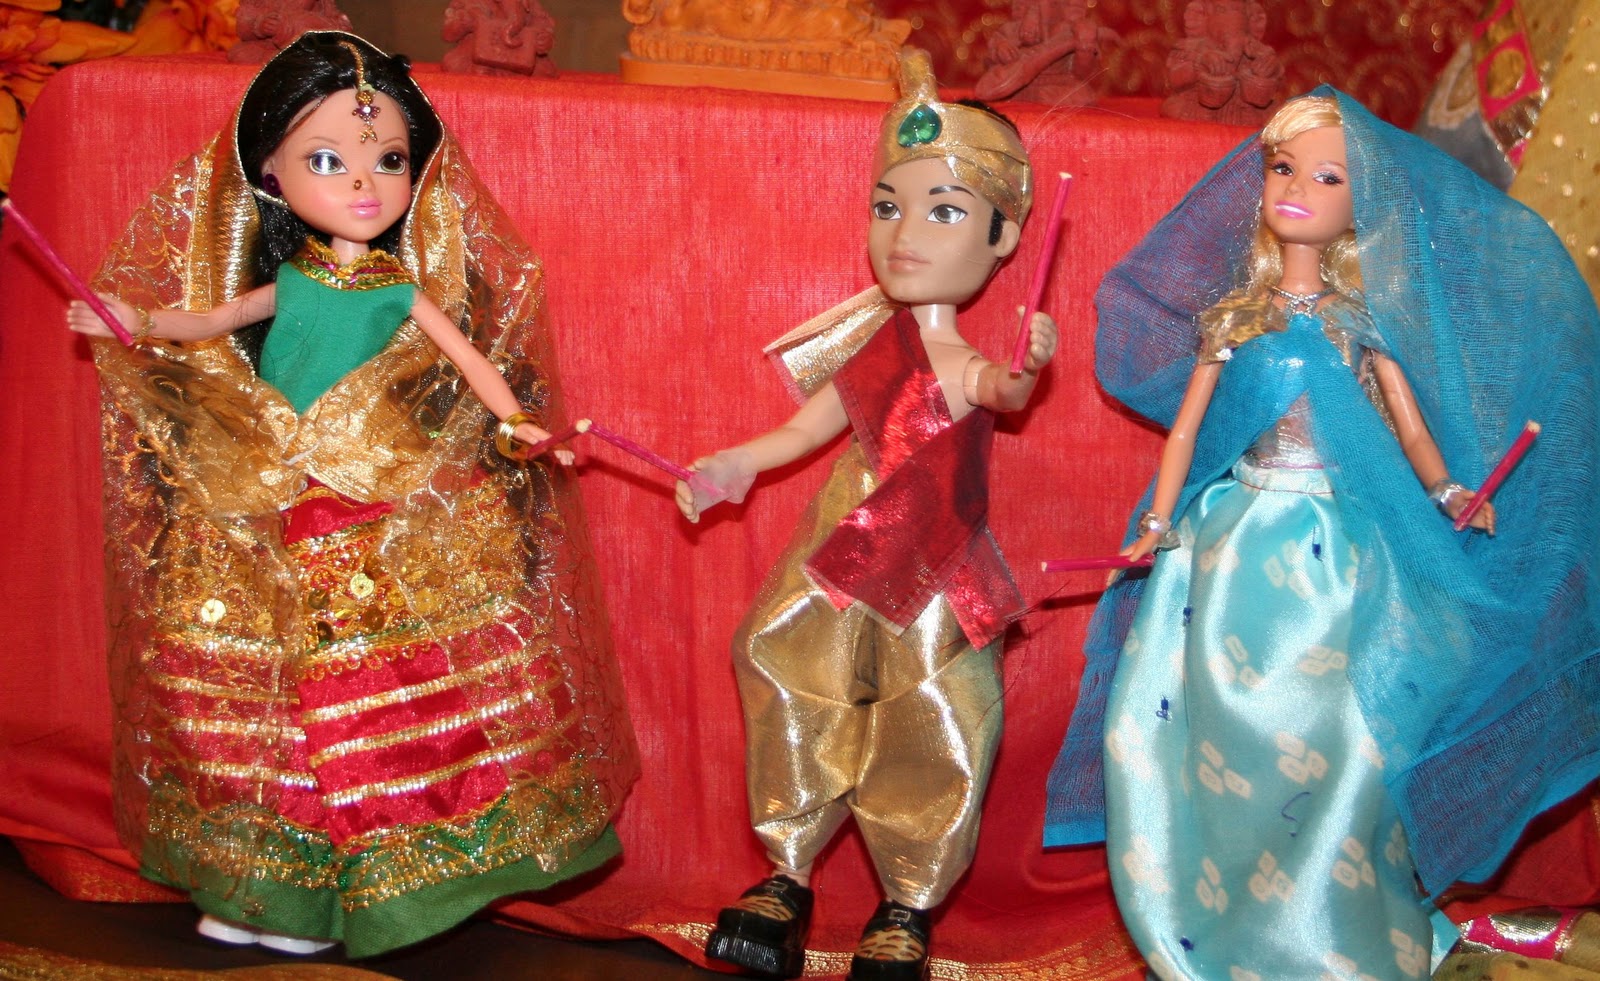
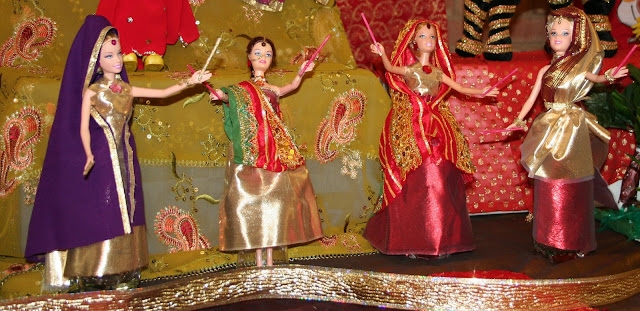
By looking at the pile of barbie dolls that my daughter has got, I could not think of anything else, other than decorated dasara dolls. I decorated them all with left over craft materials and cloth at home. I used hot glue for attaching all the jewellaries and even for making the dresses.
So all Ria's dolls got new dress and new look for this Dasara. Every one loved the krishna, which is actually a baby Belle.
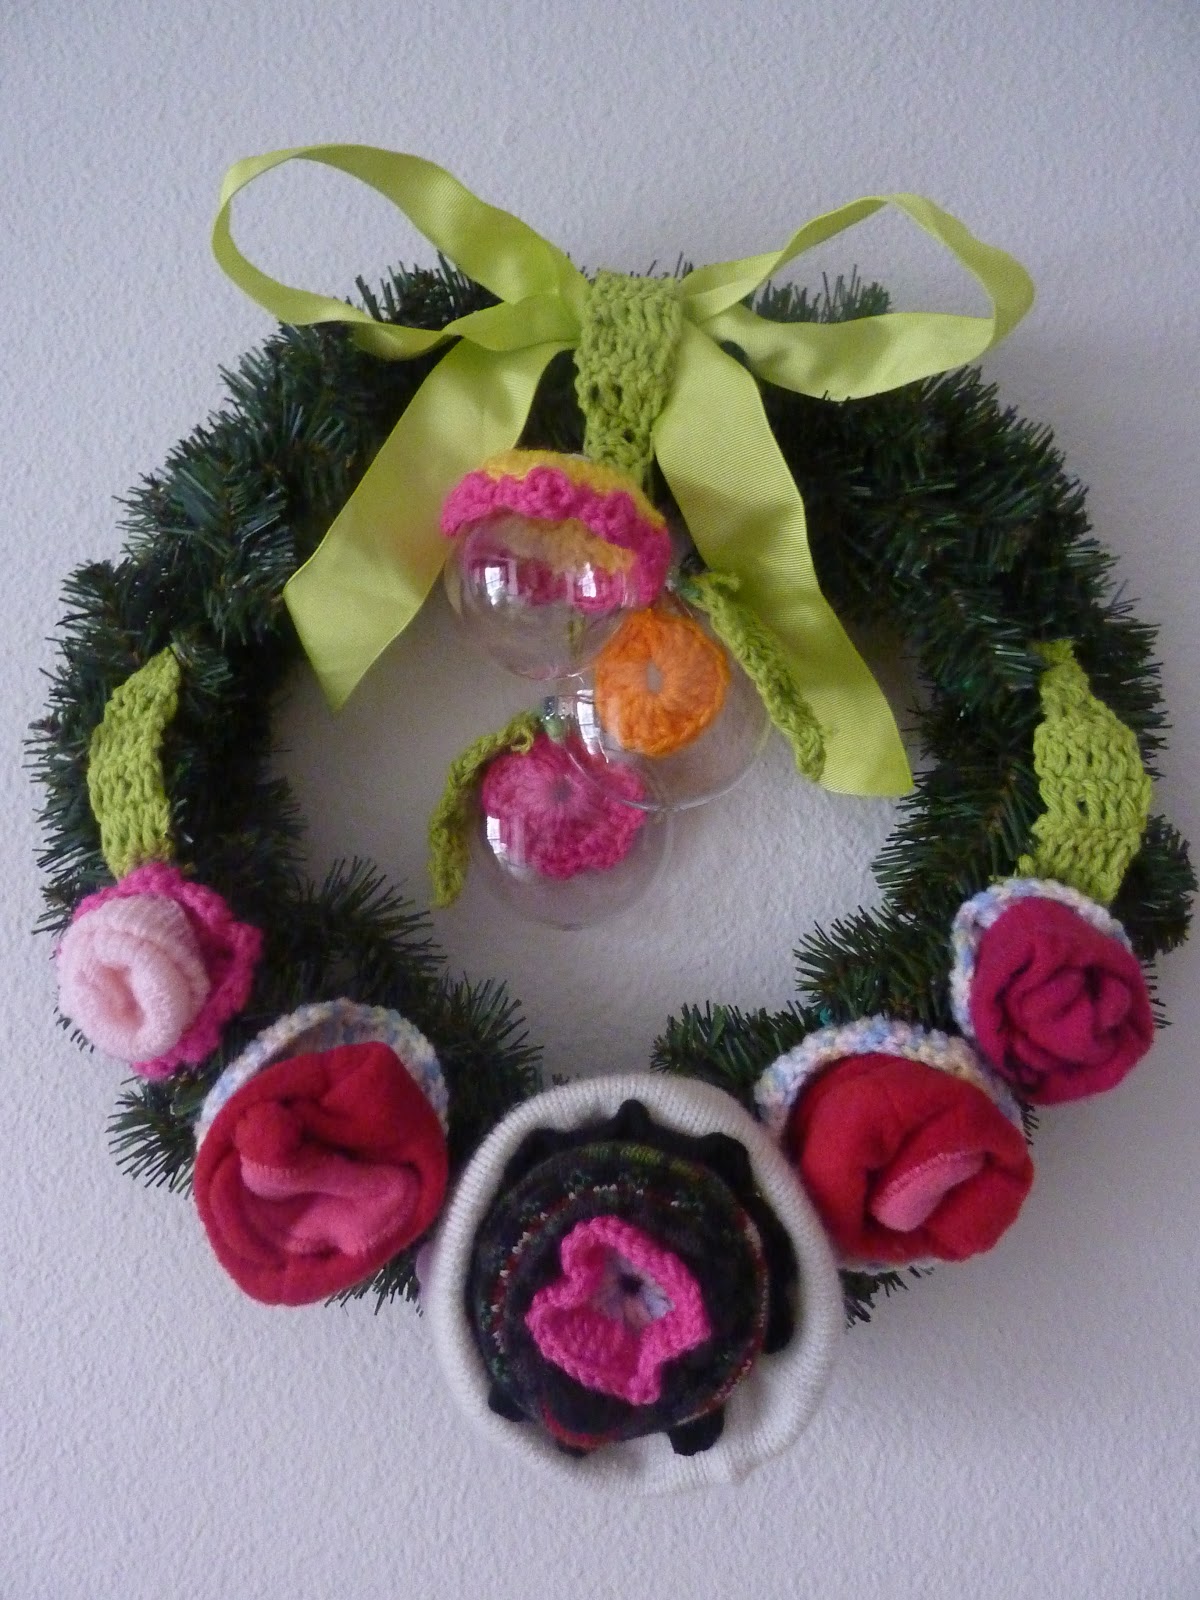
Celebrate It 18" wreath, 3 Celebrate It plastic craft Ornaments, Green,yellow, pink and mixed white Yarns, 1 Crochet hook,old yarn hat, mittens and and leg warmer, lemon green Ribbon.
Instructions :
Made 4 small crochet circles using pink and white yarn.Pull the mittens finger part little inside and fold them as it looks like a flower bulb and stitch them to the crochet circles. Similarly fold the leg warmer as a flower and put it on top of the hat and press it down to cover the leg warmer outside to look like a petal. Now arrange all these five flowers as shown in the picture to the wreath and tie them securely by passing yarn through these flowers.
Make 2 small simple crochet circles and hang them inside the clear plastic ornaments. Make a yellow and pink bordered crochet circle and put it on the top of one ornament. Tie all these ornaments as shown in the picture along with the Green ribbon.Made some green yarn crochet leafs and attached them as shown in the picture.
I used all the left over yarns from my previous projects and old hat and mittens for flowers. So it is a very good project to recycle some of your old winter wears.
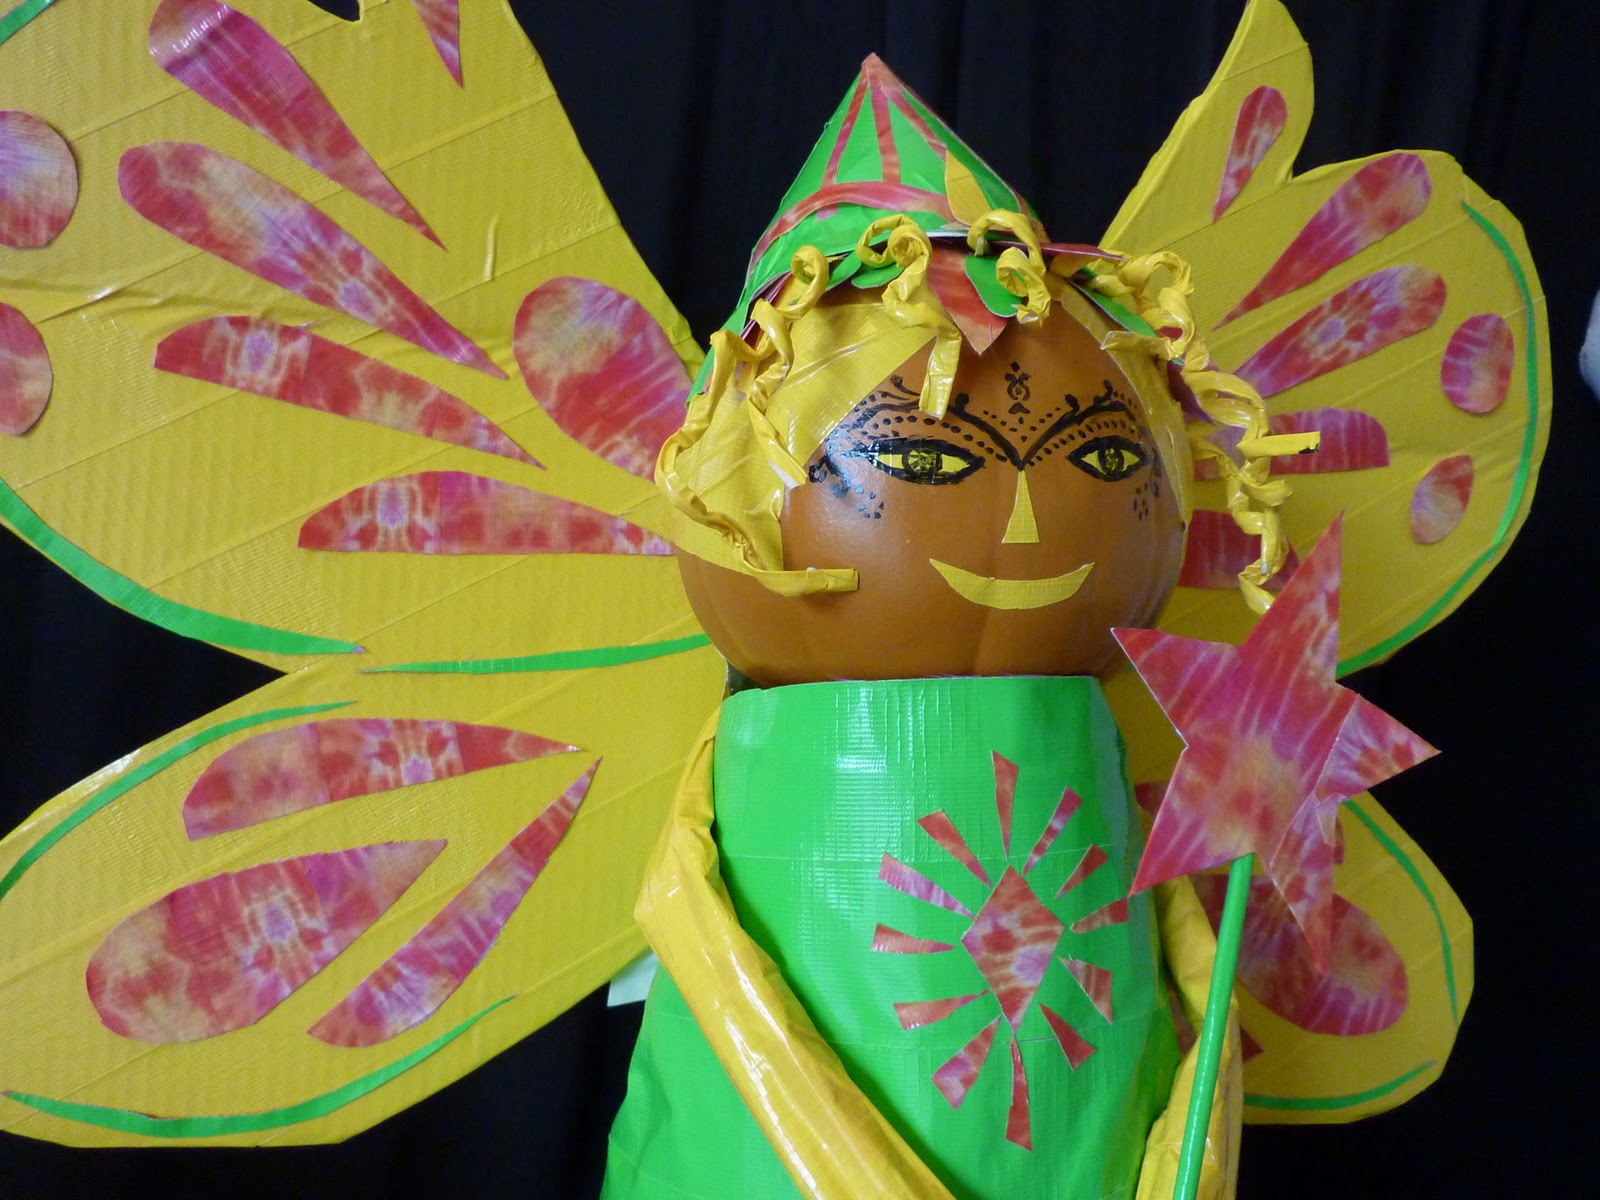
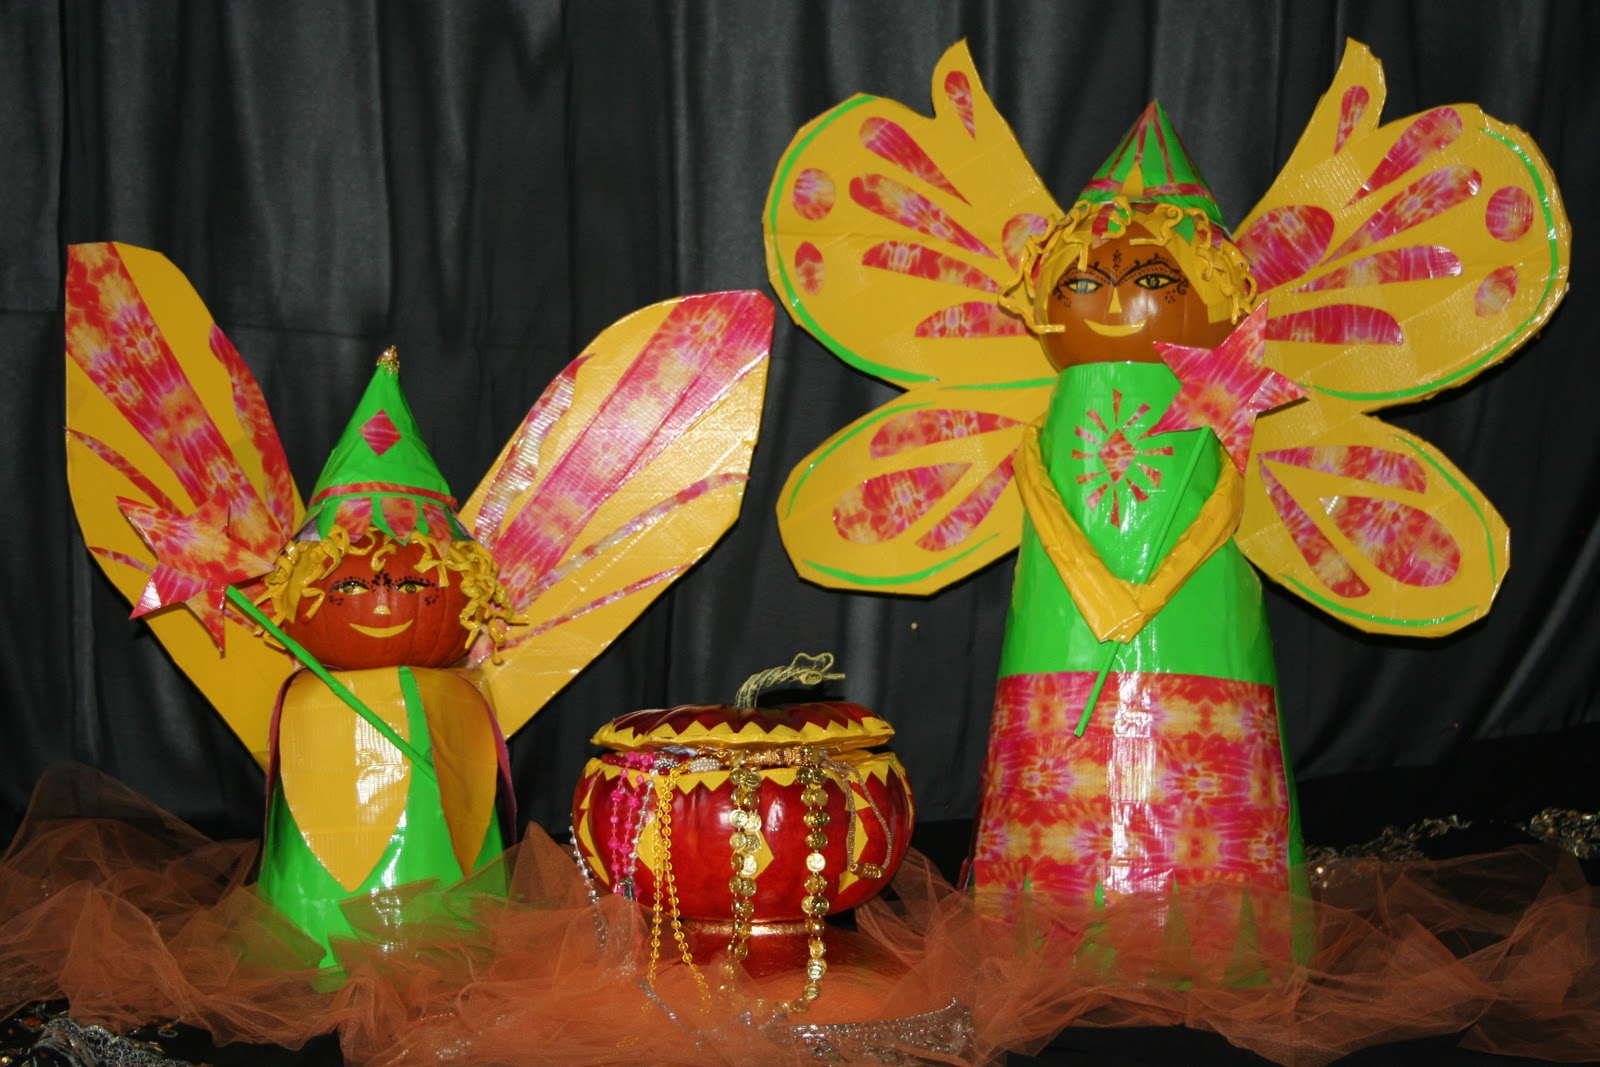
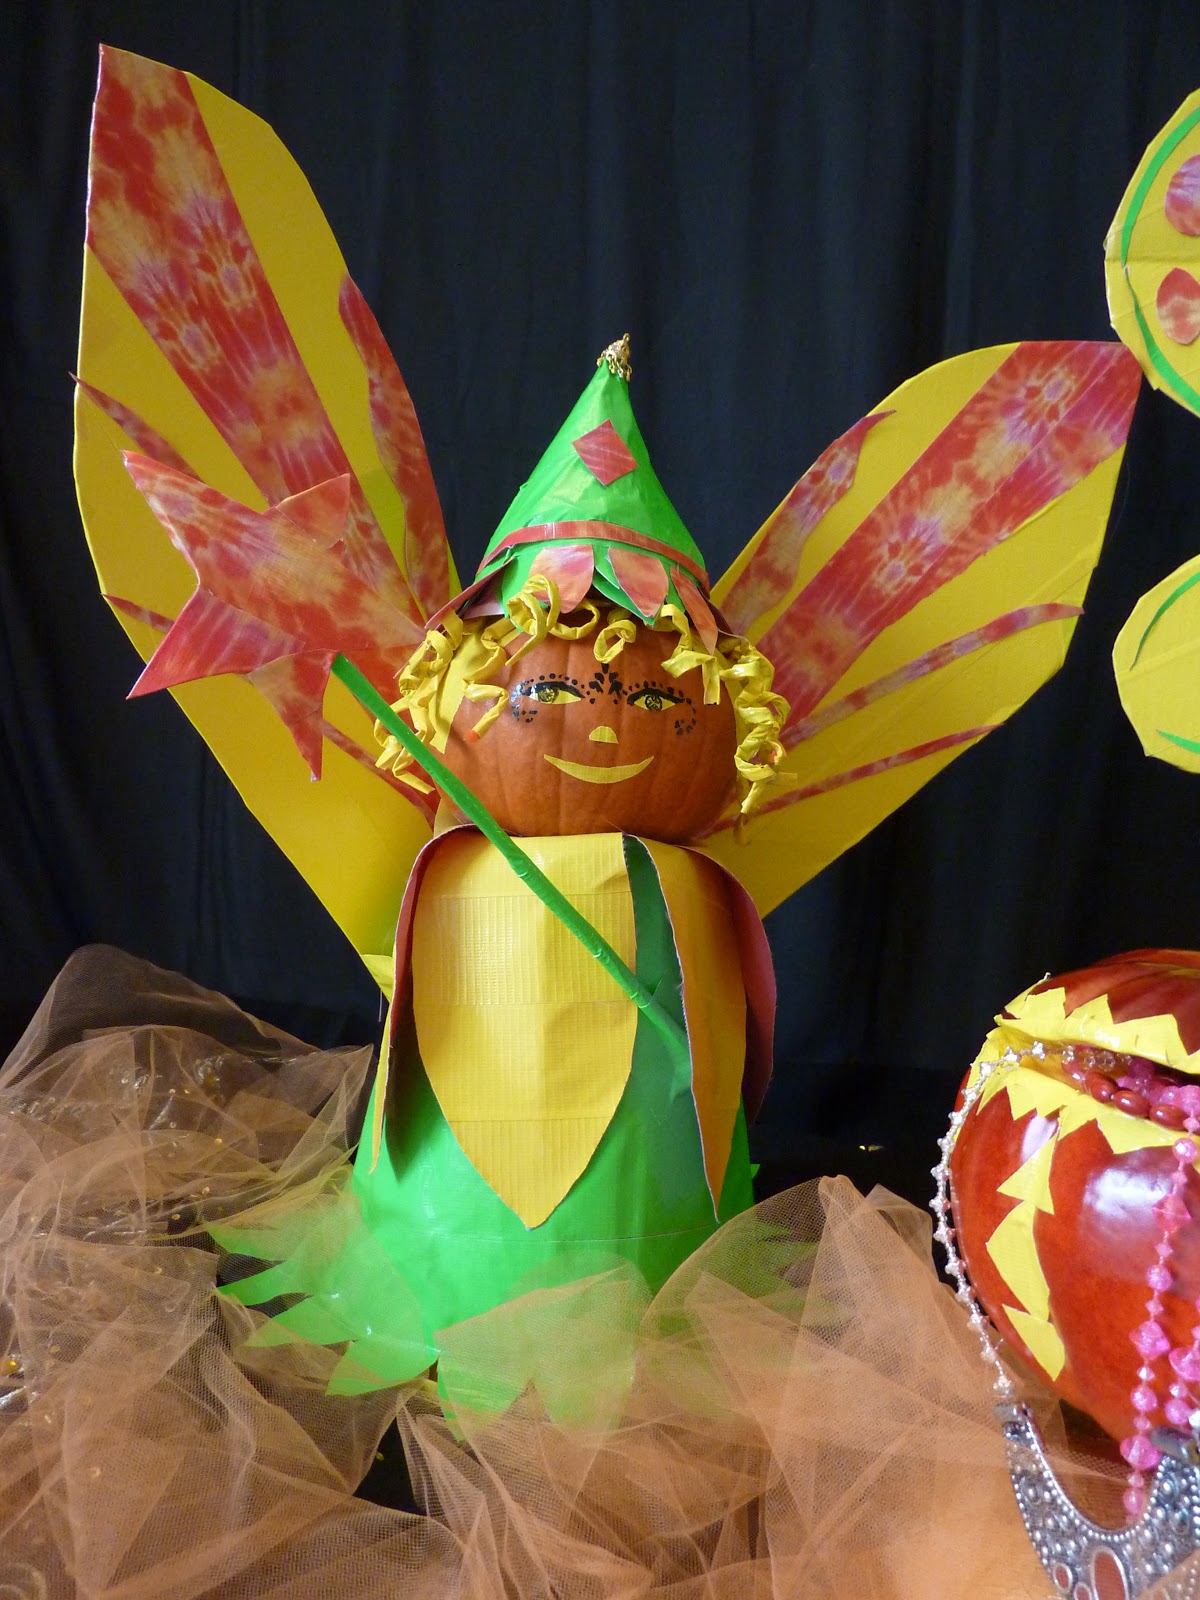
I love Fairies and Fairy tales. So I came up with these pumpkin fairies ,who are guarding a Pumpkin Treasure chest in the dark nights of Halloween.
I used Island Lime, Sunburst Yellow and Cosmic Tie-Die Duck Tapes to match the theme of Fall and Halloween. Used Pumpkins for the Fairy heads, Cardboard for the wings and buckets for the fairy body.
Then covered everything in duct tape. Treasure chest is also an artificial pumpkin, decorated with yellow duct tape and then filled with fake jewelleries.
This Halloween, my handmade pumpkin Fairies guarded my frontdoor from all evil creatures :-)
Made this white princess Gown for my 6 year old daughter for Halloween. It was a very fun and easy project, as I don't have to sew anything here. You can use a ready old gown for this project or if you know little bit of sewing and cutting , go ahead and make cute little dress for your daughter .
As I don't wanted to waste any of her gowns, I bought a less inexpensive fabric and cut them according to my daughter size gown. Before joining the fabric pieces, cover all the pieces with duct tape on one side of the fabric. Only make sure you are putting them on the outer part of the dress, other wise sometimes they mismatch and you have to do the whole thing again. some times it is very frustrating and you may leave the project in half. Because I went through this situation many times :(
Also try to put the duct tape crosswise as it gives a different look and good finishing to your dress. Once you finish putting duct tape on the fabric pieces, join the pieces using the duct tape on both the sides or you may also stitch the dress as it will be more secure to wear :-)
To make the Mask cut any kind of cardboard in the shape of an eye mask. Tape the duct tape on both sides. Roll the duct tape on any unsharpened pencil and tape it to the mask. To make the feather, tape any remaining fabric with duct tape and then cut it like a feather and tape it as shown in the picture
Making the Flower hair pin is very easy. If possible I will upload a video tutorial to make these flowers.You will also get many tutorials online. Keep exploring this beauty full world of craft.
Materials used for this project:
3 rolls of silver coin color duck tape,
1 black and white design duck tape,
3 yards of cloth,
card board,
pencil for eye mask,
hair pin to hold the duct tape flowers,
small ear stud to hold the ear ring.
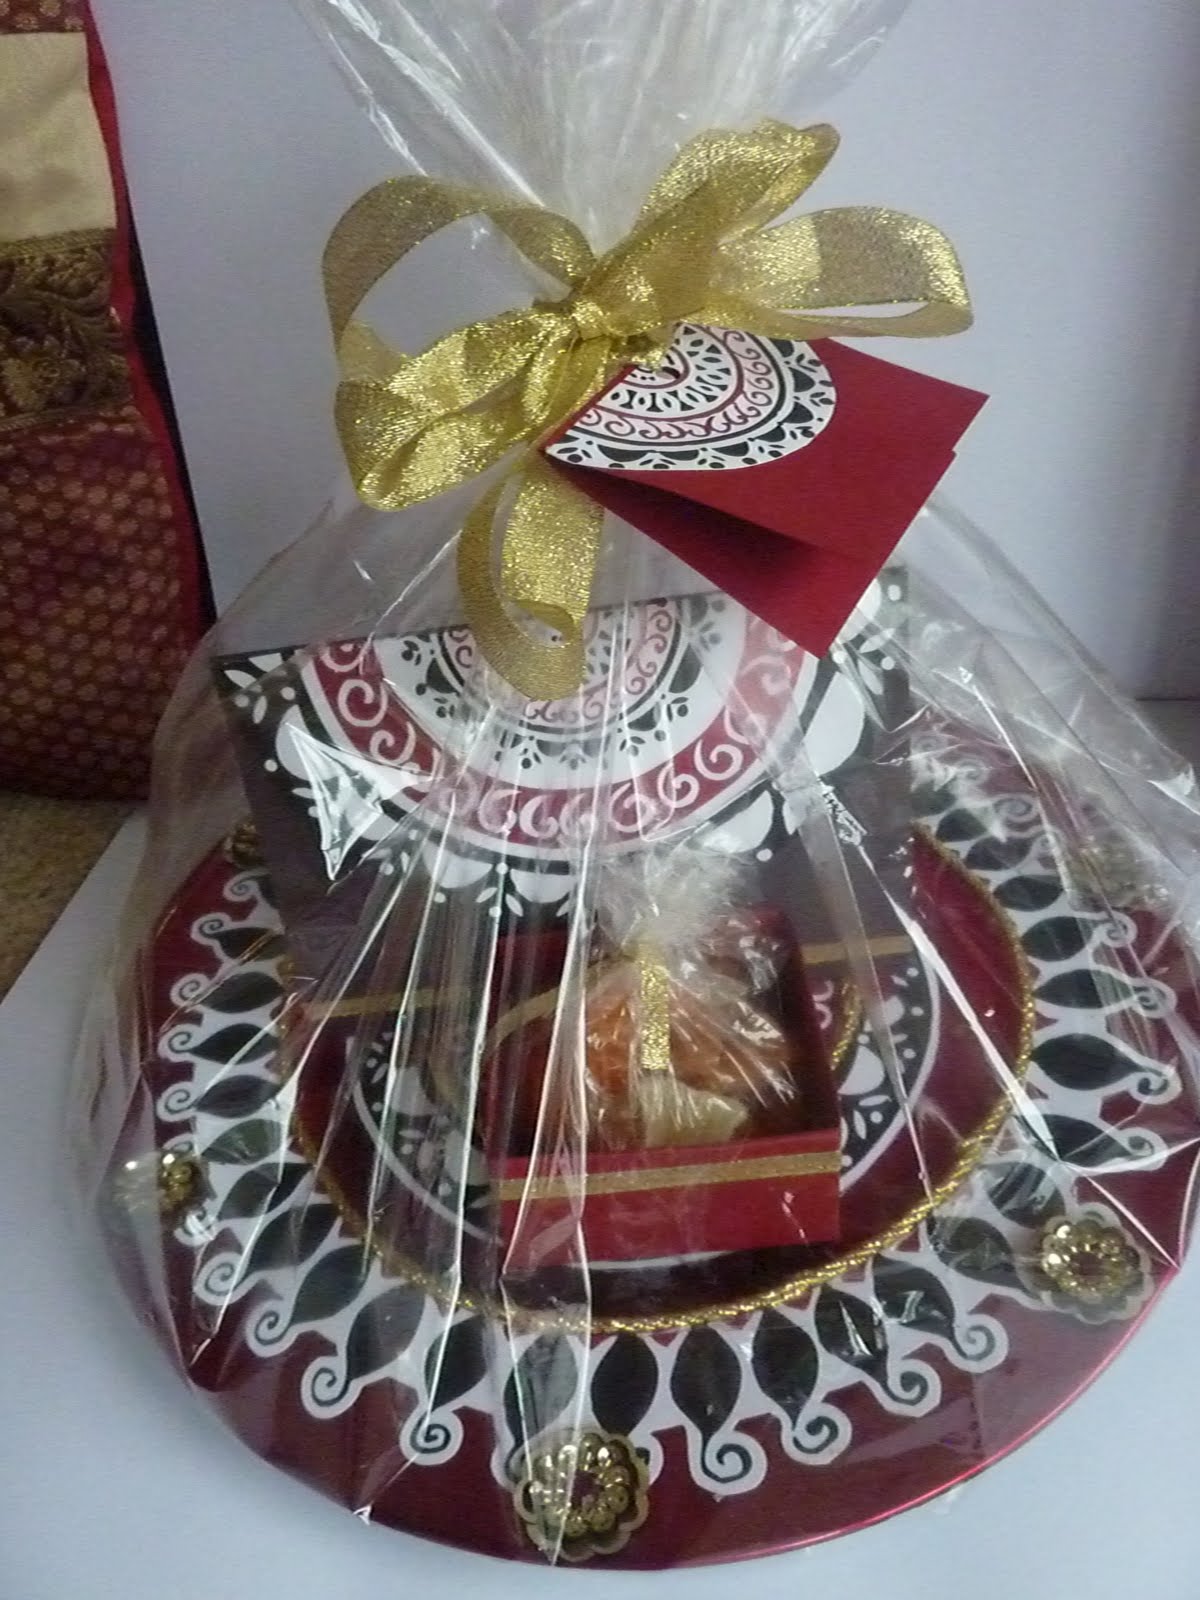
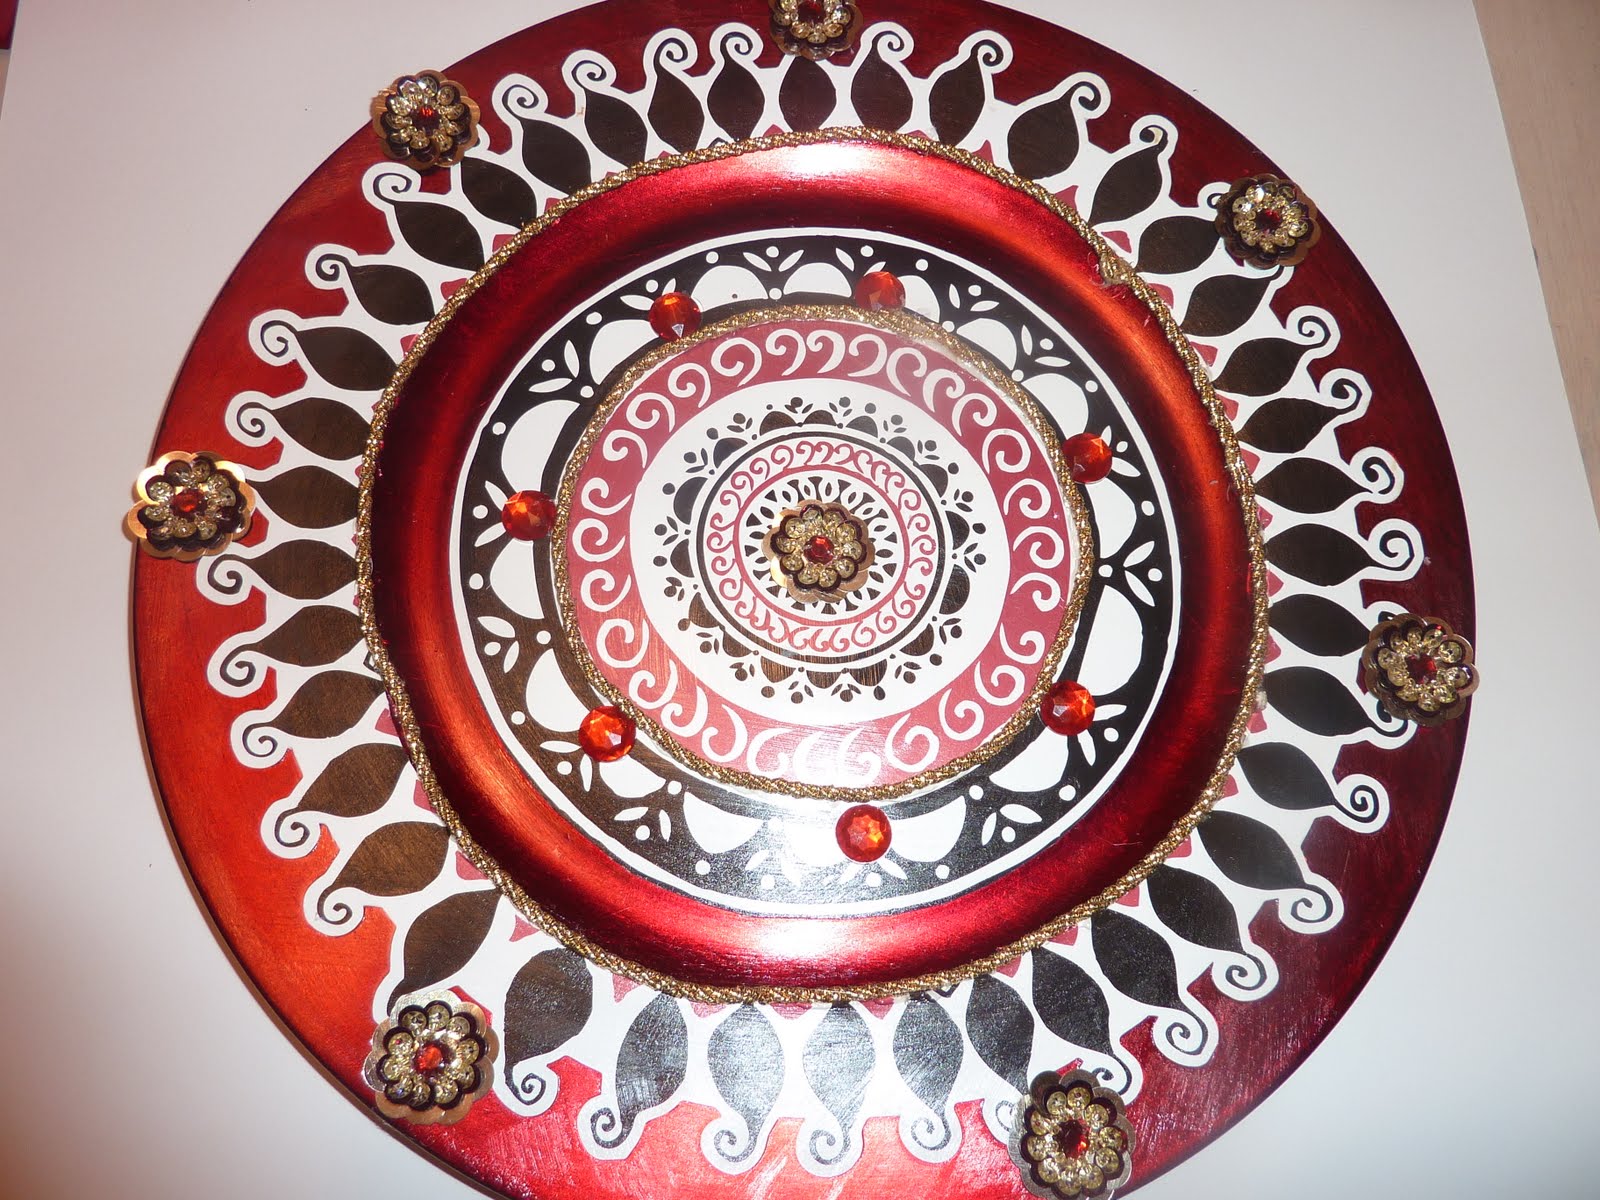
1 Red charger plate, 2 Dejaviews black and red sunflower design scrapbook paper, 2 red scrapbook paper, 1 Black scrapbook paper,Mod podge, Golden color ribbon, some rhinestones, hot glue and basket wrap.
Instructions:
Cut Dejaviews sunflower design scrapbook paper outer ring and attach it to the rim of the charger and center part in center part of the charger as shown in the picture. I Used mod podge to attach it and also coated it with mod podge for several layers. Once everything is completely dried stick rhinestones and gold color ribbon using hot glue gun.
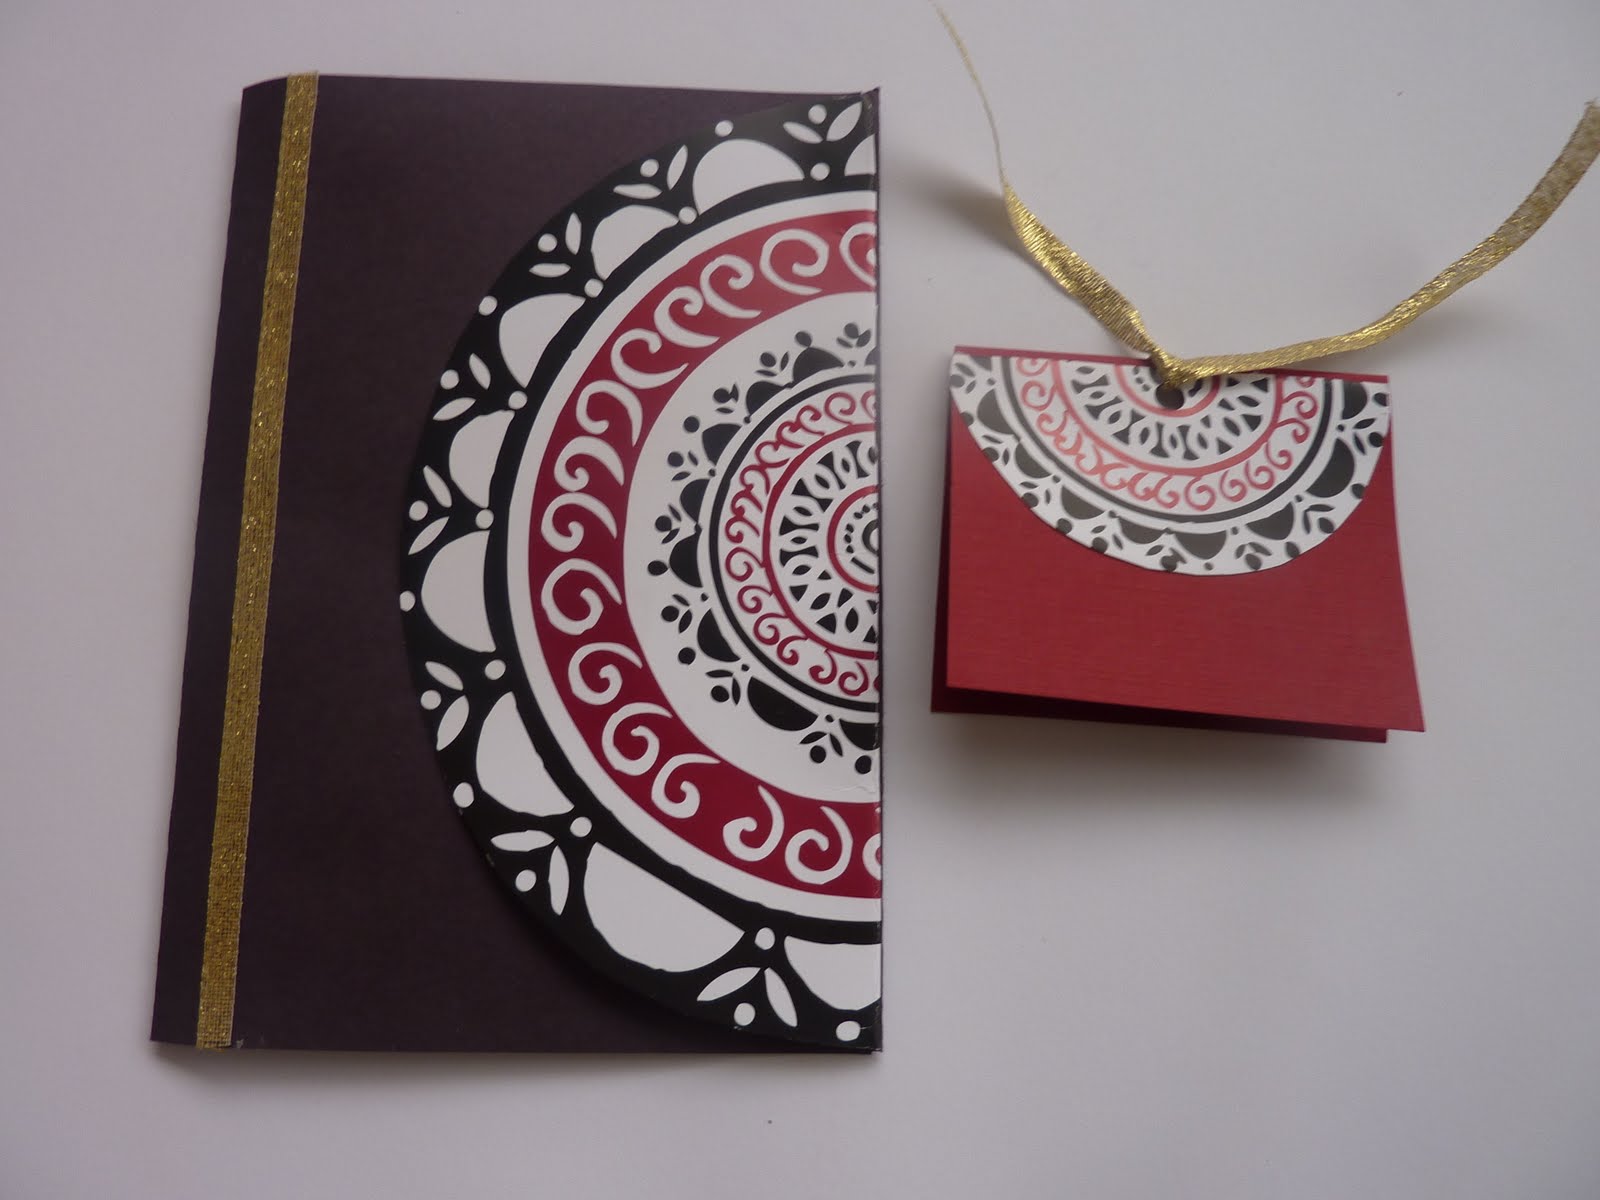
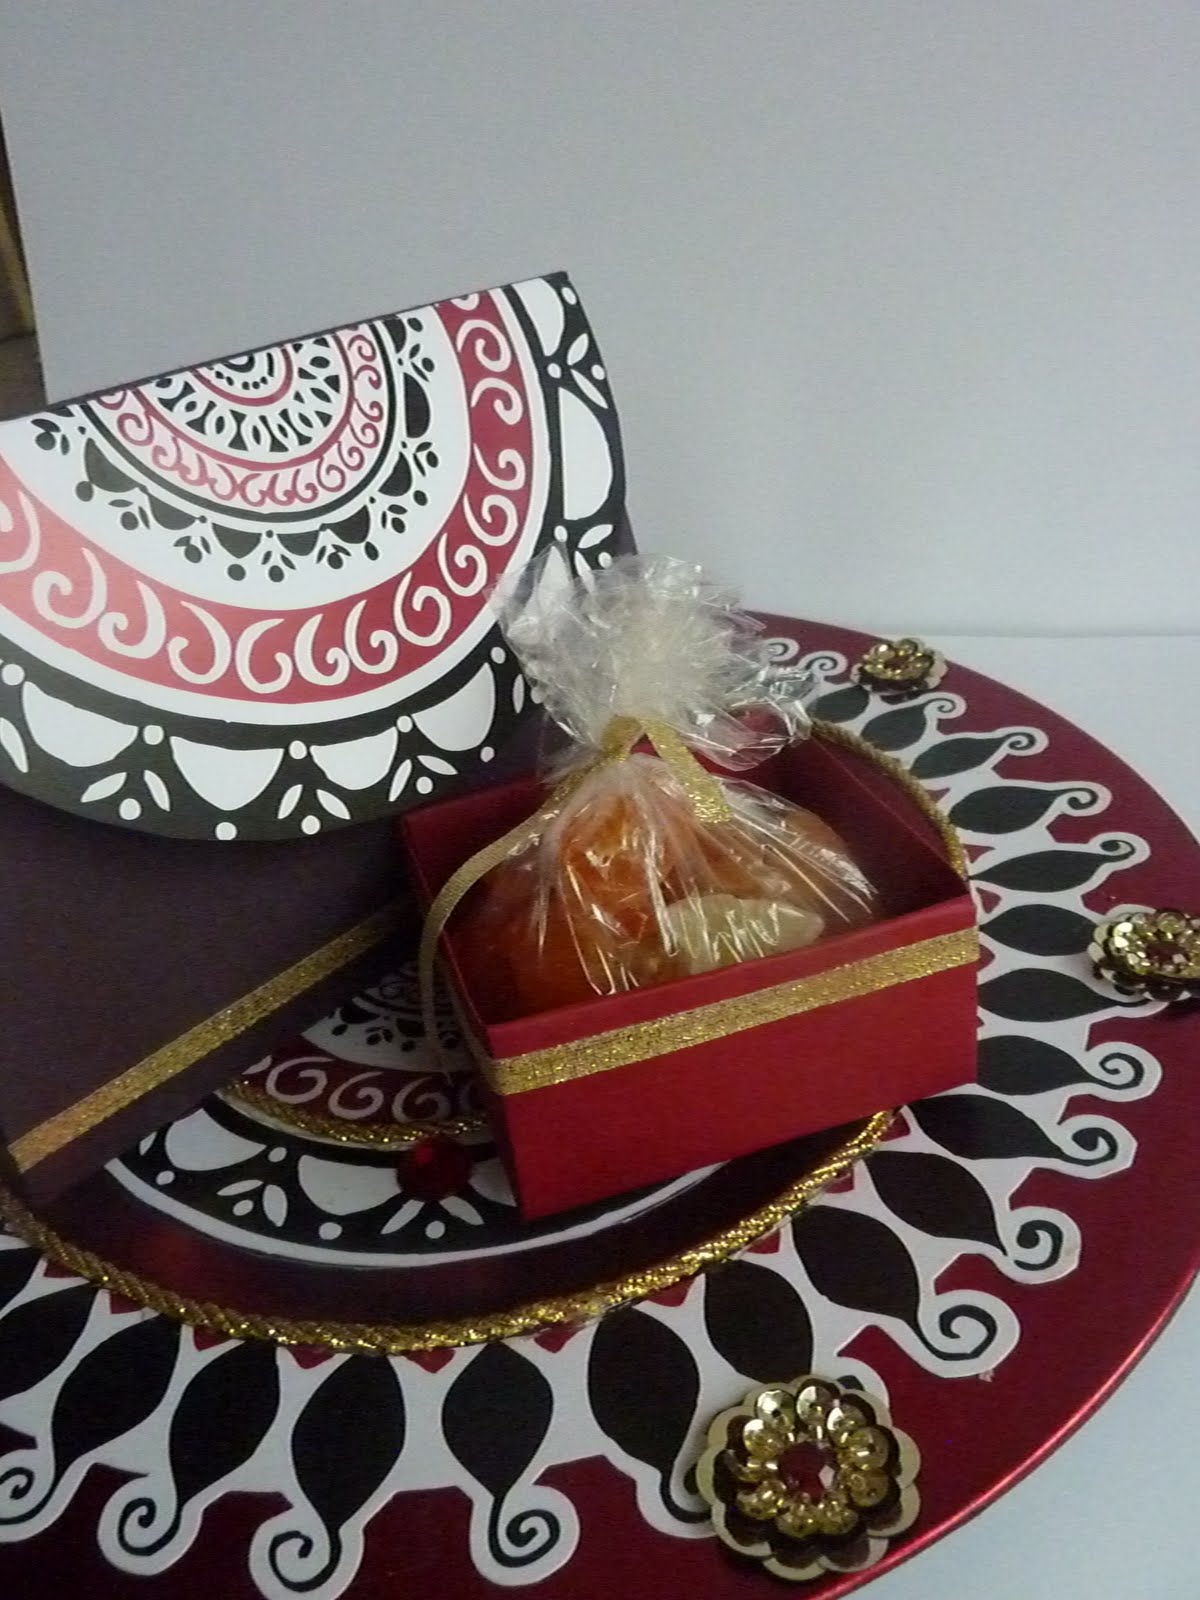
Using red scrapbook paper I made two origami square boxes and glued gold color ribbon around them.In a cling wrap, put any kind of dry fruits, nuts or cookies and tie them with gold color ribbon and put them in these boxes.
Used the same Dejaviews sunflower design scrapbook paper and some Black scrapbook paper to make a greeting card as shown in the picture.Made a gift tag from the left over scrapbook paper .
Atlast arrange everything on the decorated charger and put it in a basket gift bag and tie the bag with a golden color ribbon along with the Gift tag.
This is a wonderful gift to your family and friends. You can add even candles, soap sets or packed cheese and crackers in this Gift Tray.


